If you’re a Windows user, then you’ve probably known about the release of Windows 10 last year. So far, I have been enjoying the much-improved user interface of this latest Windows iteration.
However, one Windows 10 issue that haunted me for quite some time was the difficulty in connecting to a Wi-Fi network that was accessible in the past but has recently changed its network password. The fastest way to re-enter a new network security key is to “forget” the Wi-Fi network, which was fairly easy in Windows 8 but practically hidden in Windows 10.
If you have been experiencing this problem and haven’t found a solution, here is a step-by-step guide on how to forget a Wi-Fi network so that you can enter a new network password:
Step 1
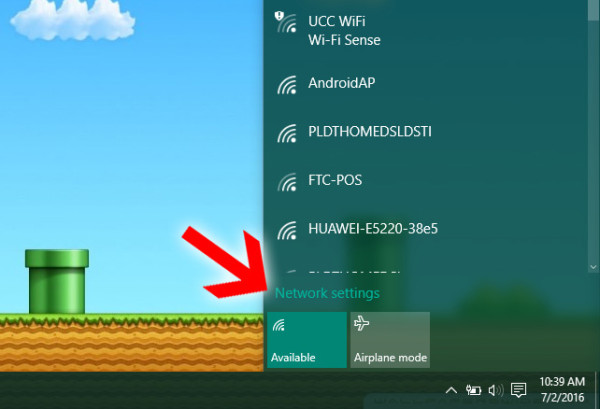
On the Windows 10 desktop screen, move the mouse pointer to the small upward arrow (or caret) at the right portion of the bottom taskbar. Then, click the Wi-Fi icon to see the available networks nearby.

Step 2
On the popup slider that appears, click “Network settings”.
Step 3
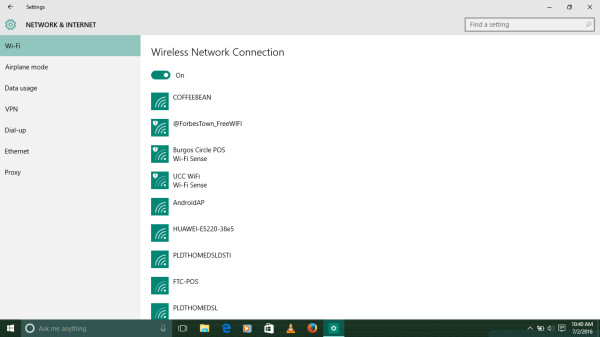
The Wireless Network Connection window will appear on the screen. The page contains all of the available Wi-Fi networks within your area.
Step 4
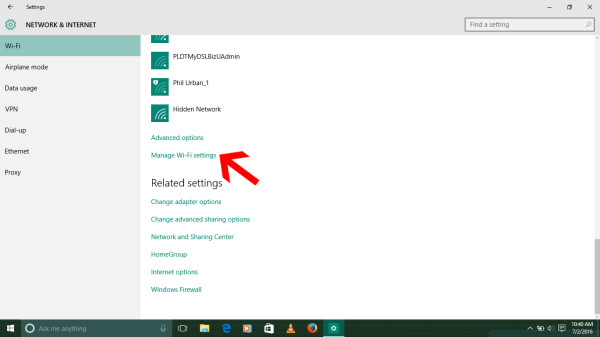
Scroll down the page and click “Manage Wi-Fi settings”.
Step 5
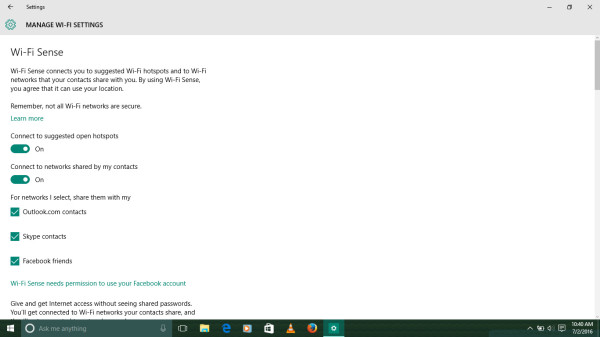
The Manage Wi-Fi Settings window will pop up. You will see the Wi-Fi Sense panel first.
Step 6
Scroll down the window to the “Manage known networks” portion. This contains a list of WiFi networks that your device has connected to in the past.
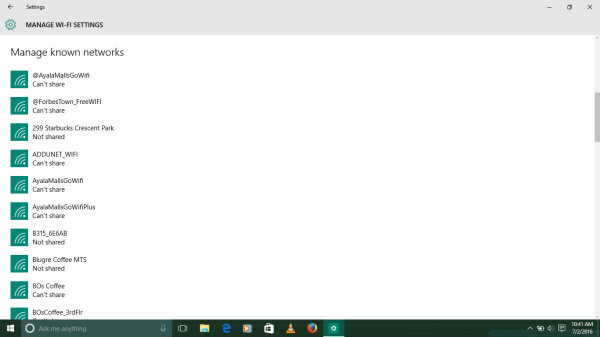
Step 7
Click the Wi-Fi network whose security key you want to change. The tab will expand to reveal two buttons. Click “Forget”.

Step 8
Close the Manage Wi-Fi settings window and repeat Step 1. Find the network that you want to connect to. This time, you can enter a new network security key.

—————————————-
I hope this quick reference can help you connect your Windows 10 laptop to your favorite Wi-Fi hotspot again.
 DavaoBase Online Home Base of Dabawenyos


